Wednesday, December 21, 2011

Delicious Chicken Noodle Soup

Delicious Chicken Noodle Soup

Well, it's certainly not cold here! It is the first day of Winter and it's 74 degrees. That isn't what I had in mind for my Christmas weather, but hey, I can't control the weather. It is kinda crazy, isn't it? Is anyone going to have snow this Christmas? We'll see!
 
I decided to make chicken noodle soup because it's a great freezer meal and my husband loves it. I do too, especially with the cold/flu season happening, it's good to have a stock-pile of this stuff!


Ingredients:
1 (3 1/2-pound) whole chicken
3 quart(s) low-sodium chicken broth
6 carrots, peeled
4 stalk(s) celery, ends trimmed
3 medium onions, peeled
5 black peppercorns
1 clove(s) garlic, crushed
10 sprig(s) parsley
2 sprig(s) thyme
1 bay leaf
2 tablespoon(s) unsalted butter
4 leeks, tops and root ends removed
1 teaspoon(s) salt
1 teaspoon(s) fresh-ground pepper
3 cup(s) (5 ounces) medium egg noodles


Directions:
Make the stock: Place the chicken and chicken broth in a large stockpot and set it over medium heat. Roughly chop 2 carrots, 2 celery ribs, and 1 onion and add to the broth. Add the peppercorns, garlic, 2 sprigs of parsley, thyme, bay leaf, and enough water to just cover the chicken. Bring the broth to a boil, reduce heat to a simmer, and cook until the chicken is very tender -- about 1 1/4 hours -- skimming the surface periodically. Remove the chicken and place in a large bowl. Strain the broth through a very fine sieve into a large, clean bowl or stockpot. Discard the vegetables.


Make the soup: Skim any fat off the top of the strained broth and discard. Slice the remaining carrots, celery, onions, and leeks into 1/4-inch-thick pieces and set aside. Remove and discard the skin and bones from the chicken, cut meat into 1/2-inch pieces, and set aside. Chop the remaining parsley leaves and set aside. Melt the butter in a large Dutch oven over medium heat. Add the vegetables and cook until the onions are translucent -- about 7 minutes. Add the chicken, the reserved broth, salt, and pepper. Simmer the soup until the vegetables are tender -- about 1 hour. Stir in the egg noodles and parsley and cook until the noodles are tender -- about 10 more minutes. Serve hot.


I am not feeling too well so I just took the recipe from this website. I have made this recipe at least 5 times and it always turns out great. There is quite a bit of chopping involved but this is delicious. As I mentioned earlier, it can be frozen. I put 2 cups per freezer bag and it freezes for a long time.

I hope you enjoy this soup!

Healthy Living

Healthy Living

At the beginning of the year, I decided I was going to work out nearly every day to get the 'baby chub' off my booty and mid-section. I worked out hard with Jillian Michaels (love her "30 Day Shred" video!) and I also did some Brazilian Booty DVD which made me laugh but it worked.

We moved back home to Florida after living in North Carolina for 3 years. We've been home since June and I have been loving every minute of it. My husband and I go to Crossfit Five Flags (click here for the website). We love everything our trainer has to offer us. It's not only about being fit physically, but it's about getting your mind right and eating healthy. It's changed my life. I couldn't be happier with the knowledge I have about working out and eating right. Even though my blog isn't geared towards clean eating, maybe I should make a new blog, I like to incorporate some of my knowledge with you!

In about 3 weeks, I'm going to embark on a new experience. I'll consume only meat, eggs, and veggies/fruit. Nothing processed. No grains, no beans, no sugar of any sort.. Check out Whole Life to see what I'm going to be doing.

Anyway, I'll post more about it when I get there but for now, I've been experimenting with different foods since I can't eat sugar (it's only 30 days.. how bad can that be?) Substituting unsweetened coconut milk in my coffee is one step and I actually like it!

I'm hoping I can get off dairy completely and never look back. I believe I have acne and excema because of it so we'll see how this 30-day experiment goes. I'll be posting and keeping you up to date on my progress.

Have you been working out in 2011? Are you going to start in 2012? What's your New Year's goals?


Saturday, December 17, 2011

Cauliflower Soup, MMM!

Cauliflower Soup, MMM!

I love soup! It's that time of year where soup is a must-have for me. I like to make large pots of soup and freeze half of it for later. It's such a great way to keep your freezer stocked full of good stuff. You'll have days where "there's nothing to eat" and then you'll remember you've stocked your freezer. Problem solved! Thanks, again, to The Pionner Woman for this recipe.


Ingredients:
1 stick Butter, Divided
1/2 whole Onion, Finely Diced
1 whole Carrot Finely Diced
1 stalk Celery, Finely Diced
1 whole (to 2 Whole) Cauliflower Heads (roughly Chopped)
2 Tablespoons Fresh Or Dried Parsley (chopped)
2 quarts Low-sodium Chicken Broth Or Stock
6 Tablespoons All-purpose Flour
2 cups Whole Milk
1 cup Half-and-half
2 teaspoons To 4 Teaspoons Salt, To Taste
1 cup (heaping) Sour Cream, Room Temperature


Directions:

In a large pot, melt 4 tablespoons butter. Add the onion and cook until it starts to turn brown. Add the carrots and celery and cook an additional couple of minutes. Add cauliflower and parsley and stir to combine.


Cover and cook over very low heat for 15 minutes. After 15 minutes, pour in chicken stock or broth. Bring to a boil, then reduce heat and allow to simmer.


In a medium saucepan, melt 4 tablespoons butter. Mix the flour with the milk and whisk to combine. Add flour-milk mixture slowly to the butter, whisking constantly.

Remove from heat and stir in 1 cup half-and-half. Add mixture to the simmering soup. Allow to simmer for 15 to 20 minutes. Check seasoning and add more salt or pepper if necessary.


Just before serving, place the sour cream in a serving bowl. Add two to three ladles of hot soup into your serving bowl and stir to combine with the sour cream. Pour in remaining soup and stir.
Serve immediately.
*For servings later in the future, do not add sour cream. Only add it when you're ready to eat the soup. This can be frozen and sour cream does not like the freezer.*

Eat and Enjoy!

Grama's Secret Strawberry Jam Recipe

Grama's Secret Strawberry Jam Recipe

My husband raves about his grandmother's cooking. She always spoils him with her homemade strawberry jam. He always asks for it and thankfully, she always has it in her freezer for when we go to Michigan to visit. Little does he know, her secret is out! Thank you, Sure Jell, for giving me Grama's recipe! I did call Grama to get some advice on how to make it like she does. If it ain't Grama's, it's not good enough for the husband. I sure hope he likes it. I had fun making it with my son!

Ingredients for Grama's Freezer Jam:
1 pack sure jell
3 cups sugar
4 cups fresh, mashed strawberries (I had about 45-50oz of strawberries)
1 cup water
Freezer-safe containers or freezer-safe mason jars (I used 9 small ones)
*You need patience if you've never canned before*


Directions:
FOLLOW THE SURE JELL INSTRUCTIONS! :)
Here's what I did..
Cut stems off fresh strawberries, rinse, cut into quarters and mash 4 cups worth of strawberries. Leave them mostly whole but macerate them enough to make them mushed and their juices come out. If you like less chunk in your jam, mash away!
By the way, this is Ayden.. my oldest, helping me mash strawberries. He cut all of the stems off and cut/quartered almost all of the strawberries. He was with me the whole time. Believe me, it took a long time to make because I kept reading and re-reading the instructions on how to make the jam and then how to can. Two experiments in one dish. Yikes!
Okay, back on track.
Get a large pot on the stove and add 3 cups sugar and 1 pack sure jell. Stir until thoroughly combined. Add 1 cup water and turn the heat on medium-high. Stir until it boils. Once it comes to a full boil, let it boil for 1 minute then turn the heat off and add the mashed strawberries. Stir like you've never stirred before!
Go ahead now and can the jam or put it in freezer-safe containers. This is good for 3 months in the fridge so that's why it's important to either can or freeze it.
It was tasty!


Warm Beef Stew

Warm Beef Stew

Today was a great day for a pot of stew. It was pretty chilly outside this morning so I decided to make something I've never made before! I was really excited to taste it because it was the best scent I've smelled in such a long time. This stew is delicious! I went to The Pioneer Woman's website and found her recipe here for it. Although I changed a tiny step, this was very tasty. I'm glad I made it!


Ingredients:
3 Tbsp Olive Oil
1 Tbsp Butter
2 pounds Stew Meat
1 whole Medium Onion, Diced
3 cloves Garlic, Minced
1 can Beer, 12 Ounce Can (*I did not use beer)
4 cups Beef Stock (or 4 Cups Water + 4 Beef Bouillon Cubes)
2 cups Water (additional, If Needed)
1 Tbsp Worcestershire Sauce
2 Tbsp Tomato Paste
1/2 tsp Paprika
1/2 tsp Kosher Salt
Freshly Ground Black Pepper
1-1/2 tsp Sugar
4 Whole Carrots, Washed, Peeled, And Roughly Sliced
4 Whole New Potatoes, Quartered (*I used two white potatoes)
Minced Parsley (optional)


Directions:
(I followed her directions except I did not use beer. I used white potatoes instead and I used rump roast from dinner the night before)
Heat oil and butter in a large pot over medium-high heat. Brown meat in two batches, setting aside on a plate when brown. Cut pieces in half. Set aside.
Add diced onions to the pot. Stir and cook for two or three minutes until softened, then add garlic for another minute. Pour in beer and beef stock, then add Worcestershire, tomato paste, paprika, salt, pepper, and sugar. Add beef back into the pot. Stir to combine. Cover and simmer for 1 1/2 to 2 hours.
The liquid should cook down to a thicker state. If it gets too thick/reduces too much, add additional water as needed.
Add carrots and potatoes, then cover and cook for an additional 30 minutes. (If stew gets dry, just add a cup of hot water at a time to replenish the liquid.) Taste and adjust seasonings as needed.

Thursday, December 15, 2011

Oven Baked Lasagna

Oven Baked Lasagna


My kids love lasagna and so do I! It's so simple to make and it's pretty fun to assemble it in the pan. This lasagna is exactly the same lasagna I made here but instead of putting it in the crock pot for 3-4 hours, I baked it 30-45 minutes.  It's so good!

*You can assemble the lasagna a day or two before you want to cook it. Just keep it refrigerated, or, assemble the ingredients in your pan and freeze it. When you're ready to bake it, defrost it and bake according to the directions below.

**I bake this and then cut into portions and freeze it for later. Lasagna always tastes better the second day!


Ingredients:1 lb. lean ground beef
1 can (26-28oz) tomato paste
1 can (8oz) no-salt-added tomato sauce
1/2pkg (about 8) no-boil lasagna noodles
1 jar (1 lb.) alfredo sauce
3 cups (12oz) shredded mozzarella cheese
1/4 cup grated parmesian cheese

Directions:
Heat oven to 375 degrees.
Brown beef in skillet over medium-high heat until cooked all the way through. Drain grease.
Spray 9x13 baking dish with olive oil spray and spread 3/4cup tomato paste sauce on the bottom.
Add tomato paste, tomato sauce and browned meat in a bowl and combine.
Layer noodles on top of the tomato paste then add 1/3 Alfredo sauce, 1/3 mozzarella cheese and top with the paste/sauce/meat mixture and keep doing these layers until all ingredients are used.
Sprinkle the grated Parmesan cheese on top.

Bake at 375 for 30-45 minutes.
Turn broiler on high and broil until cheese on top is browned.

Monday, December 5, 2011

Cream Cheese Cookies

Cream Cheese Cookies

I entered a giveaway drawing on one of my favorite food blogs hoping that I'd win some awesome kitchen utensils. The drawing is for your favorite cookie recipe. Another lady posted these cream cheese cookies on her facebook fan page so I thought I'd give them a shot. After all, they looked simple to make!


Ingredients:
8Tbsp butter (1 stick unsalted butter)
3Tbsp cream cheese
1cup sugar
1cup flour
1/2tsp salt

Directions:
Preheat oven to 350 degrees.
In a bowl, beat sugar, cream cheese and butter together for 3-5 minutes. Add the flour and salt mixture and mix until blended together.


Line a cookie sheet with parchment paper and place tablespoon size portions of dough on the cookie sheet. Bake 10-13 minutes, or until the bottom of the cookie just starts to turn golden. Remove from cookie sheet and cool.


I liked these when they were still warm so place them in the microwave for a few seconds, if they're cold, if you prefer them this way.

Eat and Enjoy!

Sunday, December 4, 2011

Garlic Flavored Pecans

Garlic Flavored Pecans

My mom loves pecans and usually has a huge bag in her freezer any day of the year. They are pretty expensive, but they are yummy! She bakes with them all the time and shares them with her darling daughters when we need some, too. 


My Uncle Jack made these the same day we made his famous fudge. Here what you'll need to do.

Ingredients:
As many pecans as you'd like
3-5Tbsp unsalted butter
Garlic salt

Directions:
On a microwave safe plate, spread the pecans out in a single layer and add tabs of butter to the plate. Sprinkle on as much garlic salt as you think you'd like. Set your microwave for 8 minutes, stirring the mixture every 30 seconds.


Once the 8 minutes are up, you'll have a delicious snack ready to eat any time you like. Let them cool down before you pop one. They'll be hot!

Special thanks to my sister, Chris, for this fantastic photo!


Serve. Eat and Enjoy!

Saturday, December 3, 2011

Uncle Jack's Fudge

Uncle Jack's Fudge

My Uncle Jack is the most awesome uncle I have. When we needed a place to stay when I was younger, he and my aunt opened their home to me and my family. I will always love them like my second parents and cherish every moment we were able to spend with them.
I grew up going over to their house and riding on their lawn mower for hours a day. It was so much fun! My sister and I also drove his tiny Datsun .. uhh .. I don't think she was over the age of 13 hahaha. His house is where I learned to love home grown veggies, my favorite are his cucumbers. Fresh is much better than store bought.
I always cooked the corn bread and anything he would let me do. He was a great teacher in the kitchen. I was able to spend time with him again this week at my mom's house.We had a great time making his fudge and I hope we can do it again next year!

My mom, Judy. Her brother/my Uncle Jack. Me and my sister, Chris.

This isn't the typical super fat, gooey fudge that resembles icing. This is pretty flat with tons of pecans in it. It is very soft but, to me, this is the best fudge. Probably because it's the first fudge I ate and all the memories I shared with him when we cooked together.


I will admit, my uncle just "knows" when it's time to remove the candy from the heat. Apparently, my sister's hasn't turned out the way it should've. It probably stayed on a minute too long. That extra minute will turn it into a sugar-textured candy instead of a smooth and chocolaty mixture. This was the second year it happened! AHH! Next year, Chris! :)

Ingredients:
2 cups sugar
1/2 cup cocoa powder
1 cup whole milk
pinch of salt
2.5Tbsp karo syrup
3Tbsp melted butter

Ingredients added after it's in the bowl cooling:
1tsp vanilla
2Tbsp melted butter

Directions:
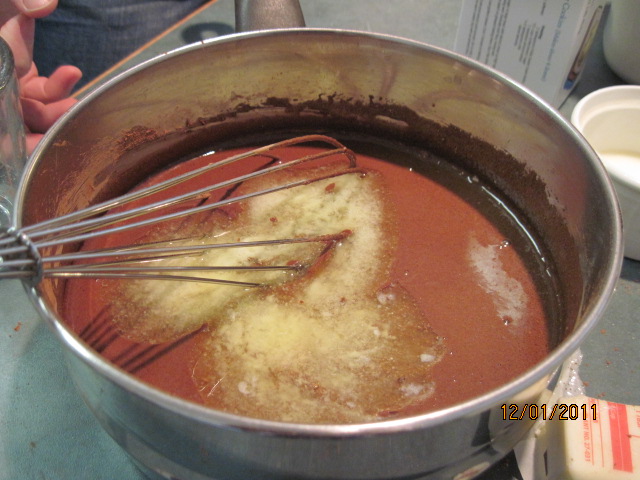
Whisk all ingredients together in a large sauce pan. The mixture has to boil and will rise a bit so make sure you have enough room so that it doesn't boil over.


This will cook about 25 minutes so go ahead and set your timer for 25 minutes.
Turn your burner on to medium-high. My uncle says to stir every 30 seconds or so and do not walk away! You want to temperature to reach 260 degrees. If you have a candy thermometer, you'll need to use it. It should boil with little tiny bubbles and reduce in size once it's nearly finished cooking.


So, your fudge should cook about 20-25 minutes or so. Make sure it reaches 226 degrees and has reduced in size.


If you lift your spoon and let it drip, it shouldn't be too liquidy when there's a little bit left on the spoon. You can lift it out and see thick drop coming off the spoon or get a cup of water and let some go in there, if it goes into little balls, you know it's ready to come off the burner.


We didn't have enough 9x13's so large bowls will do the trick too.


Have a 9x13 pan ready to pour your hot fudge in. It needs to cool in the pan for about 5 minutes. Once 5 minutes are up, stir in the 2Tbsp melted butter and 1tsp vanilla. Stir this mixture about 5 minutes until it starts to get thick. Don't let it become a solid in the pan and on your spoon or you'll have a hard time spreading it out.


Add pecans, as many as you'd like and stir until you're happy with the amount of nuts. If you want to add other things in there, go for it! I like it with and without pecans though. Both ways are awesome.


Next step, pour it onto parchment paper and cover with plastic wrap to smoosh down the the size and thickness you'd like. It'll cool quickly so make sure you're happy with what you've done before walking away from it.


YUM!!!!!!!!


Once it's cool to the touch, remove plastic wrap and cut into pieces. This is seriously the best fudge I've ever had and the times I've made it have made me thankful for my family who love me enough to feed me chocolate!!!


Eat, share, and enjoy!

(I took a lot of pictures this time.. this was a special baking day for me. I also practiced with my sister who showed me a lot of great tips on better pictures. I'm doing better! haha)


Thursday, December 1, 2011

White Christmas Chex Mix

White Christmas Chex Mix

This is, by far, the easiest snack I've ever made. I was introduced to it at my previous job since there were a handful of ladies there and tons of men. We had to take care of their bellies and test our recipes on them and they never said "no" or "gross"!

Ingredients:
6 cups total of Chex Mix cereal (corn or rice half and half or one or the other with the full 6 cups)
2 cups plain Cheerios
2 cups stick pretzels
2 cups dry roasted peanuts
1lb. bag of plain m&m's
1 bag/box of vanilla almond bark (you can find this in the baking aisle)


Directions:
In a large bowl, mix all of the dry ingredients together until incorporated. Set that to the side and melt the almond bark per the instructions on the bag. Once that's melted, pour over the dry mixture making sure it's all evenly coated.
Lay a sheet of parchment or wax paper down on a baking sheet and pour the mixture out evenly. Let this dry about 15-20 minutes then break into pieces and EAT!
Store this in an air tight container and it will last forever!
My co-workers always put this in pretty see-through bags with red or green ribbons on top as gifts. This is so simple to make and the kids would be a great help with this one.


Eat and Enjoy!